Deck & Fence Staining (Toronto, 2025)
We are the deck & fence staining experts of Toronto. Our team specializes in treating & maintaining exterior wood such as decks, fences, porches and siding. Deck & fence staining has become our niche after having worked on hundreds of projects over the years. Other companies offer deck staining as a side service (ex. in addition to exterior painting or building a deck). For us, deck & fence staining is our core business. We have invested time and money into the best products, processes and equipment for transforming your deck.
This is why we are the only deck staining company in Toronto with a
NO PEELING GUARANTEE!


Zero Peeling
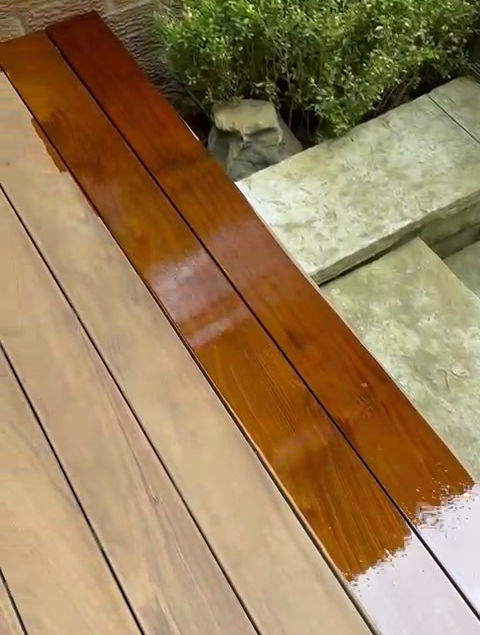
Our team uses top of the line oil-based stains (Cutek Extreme Wood Oil) which means your deck will never peel. The product is easy to reapply and maintain which means you won't have to strip your deck in the future!


Efficient & Dustless
Our team is equipped with the top of line dustless sanding equipment which allows us to prep your deck in less time, keep your house clean, and save you money.


Daily Updates & Cleaning
We send daily video updates so that you know exactly what's going on without having to be there. Our crew always protect the surrounding areas and clean up daily so your house never looks like a mess.


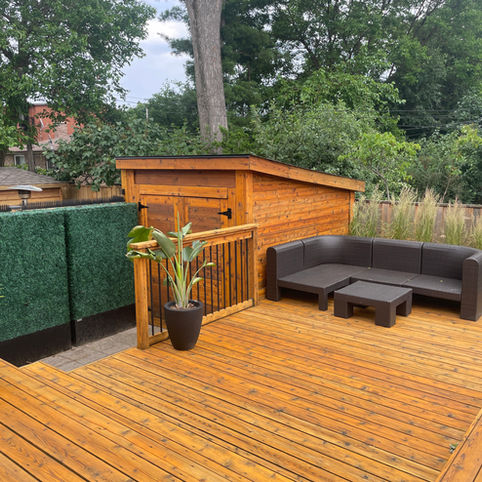
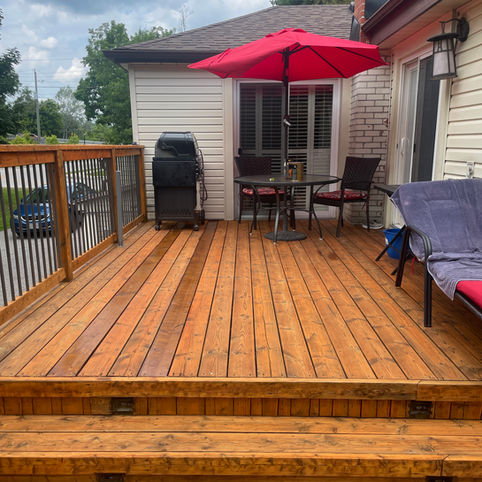
Our Deck & Fence Staining Projects

Deck & Fence Staining Process
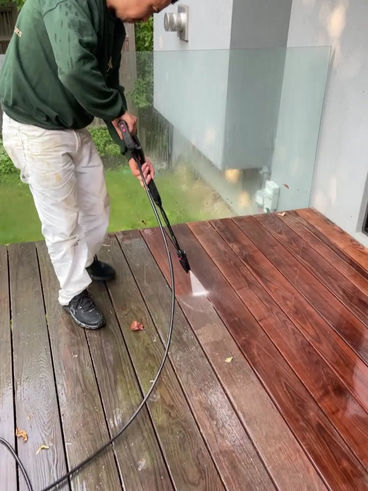
Step 1 - Cleaning/Pressure Washing
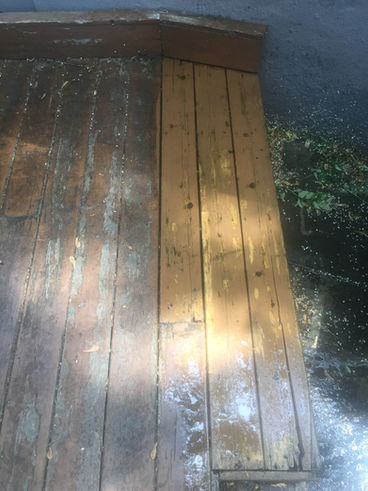
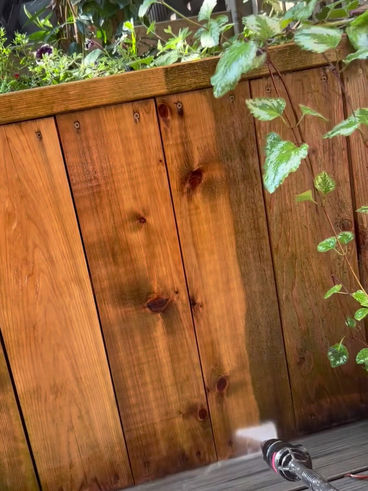
Dirty surfaces need to be cleaned prior to staining. For clean or bare wood, a quick sweep would usually suffice. For dirtier surfaces, a pressure wash along with deck cleaner or detergent may be required. If you are planning on fully restoring your deck, we would use a deck revive solution which helps clean the wood and restore grey wood fibres. This is important because you will be able to see any imperfections and dirt on the wood once you stain it with a semi-transparent or natural-stain product.
Step 2 - Dustless Sanding
The second step of the deck finishing process is to sand down the wood surfaces. Our team uses top of the line equipment to ensure that your deck is both sanded properly and efficiently to save you money. The Festool sanders we use are connected to a dust extractor to ensure that our team is protected and that your house isn't covered in saw dust.
Sanding serves three purposes:
-
Open the wood pores so that they accept the stain
-
Smoothen the surface so it looks and appears nice
-
Removes existing imperfections and coating
The extent of sanding required will depend on your project.
Light Sanding: Light sanding is reserved for solid-stain projects. We pass by all the surfaces once with 80 grit sand paper to smoothen the surface and prepare it for the stain. This is acceptable because solid stains cover imperfections and do not need to penetrate into the wood as much as semi-transparent or natural stains.
Medium Sanding: If the wood is bare, you can perform a medium sand to smoothen the surface and open the wood pores. More time is spent than a light sand. The optimal sandpaper is 80 grit which opens up the wood pore enough to take in the stain while maintaining a smooth finish. If you go finer than 80 grit, the stain will not be able to absorb into the wood as well.
Full Sand / Stripping: If you have a previous coating and want to apply a new product, you will have to do a full sand/strip to remove any coating that was previously on the deck/fence. Similarly, if your wood is extremely grey, you will need to fully sand all those damaged fibers off. This process is extremely labour intensive but provides the best results. We do the first pass with 40 grit sand paper to remove old coatings and fibers. Afterwards we use 80 grit to smoothen the wood prior to applying stain.
Step 3 - Vacuum & Staining
The last step is to vacuum or dust off all of the dust and debris from sanding. Leftover dust can cause texture or prevent the stain from absorbing to the wood (you might be staining dust instead of wood). Once the surface is clean, we apply the stain via a brush or lambs wool. If the surface is large, we may apply the stain with a sprayer and then back-brush the stain so that it gets worked into the wood.
Some products allow for a second coat, others require the first coat to still be wet while applying a second coat.
Step 4 - Maintenance
The most cost effective way to preserve the beauty of your deck is to do regular maintenance. You should do a light pressure wash every year (LIGHT!!! anything more will damage your deck) and reapply a coat of stain every 2 years. Decks in Toronto and the GTA take a beating because they are exposed to sunny summers and wet winters. As such, no product or prep will make the deck last forever (we have tested many products). Vertical services can be serviced every 5 years or so but horizontal walking surfaces such as decks should be regularly maintained every 2 years. Applying a coat of stain every 2 years costs much less than leaving your deck for too long and having to strip it.
Our Reviews
5/5
Peggy Moulder

Vincent went out of his way to get my painting project in Mimico/Etobicoke, done quickly and professionally. I was very pleased with the results. Strongly recommend Finesse Finish Painters for your painting projects.
2025
- 145Page 1
Deck Staining Services

Deck Restoration Package
Best For:
-
Old decks with previous coatings
-
Homeowners looking to apply a natural or semi-transparent stain over an existing coating
-
Old worn out decks
Includes:
-
Product: Cutek Extreme Wood Oil
-
Pressure wash & revive solution
-
Full deck sanding & stripping
Starting at: $3250 +HST

Natural-stain Deck Package
Best For:
-
Bare decks with no previous coatings
-
Decks made from higher quality wood (ex. IPE, Ashwood or Cedar)
-
Homeowners looking to maintain the natural look of their deck
Includes:
-
Product: Cutek Extreme Wood Oil
-
Pressure wash
-
Medium sanding
Starting at: $1650 +HST

Solid-stain Deck Package
Best For:
-
People looking to achieve a solid colour
-
Old worn out decks that cannot be restored
-
Decks made from lower grade wood
-
Homeowners with a tight budget
Includes:
-
Product: Dulux Professional Acrylic Wood Finish
-
Pressure wash
-
Light scrape & sand
Starting at : $1650 +HST
Deck Staining FAQ
Q: What is the difference between paint and stains?
The main difference between staining and painting is how both products adhere to the wood. Paints sit on top of the wood, providing a protective film which covers the wood. This means that as the paint weathers, it will start to peel and flake off. Stains on the other hand tend to penetrate the wood and prevent water and UV from entering and damaging the wood. As stains age, they fade or very lightly flake unlike paint.
Q: What is the difference between natural, semi-transparent and solid stains?
A: Solid stains are best suited for when you want a specific colour (they can be tinted in many colours just like paint), when the wood is ugly, old or has previous coatings. Solid stains can go over top most other stains without looking stupid and do not require excessive prep-work. They can also be applied to bare wood surfaces without needing to be primed (unlike paint). Another reason that homeowners choose solid stains is because they do not peel as they weather; instead they fade or lightly flake like other stains.
Transparent stains are sometimes also called natural stains or even called sealer. These stains protect decks and fences from water but do not to alter the natural colour and appearance of their wood. With that being said, most transparent or natural stains still add a slight pigment and give the wood a "wet" look. Transparent stains work by penetrating the wood and preventing water from absorbing into the wood. However, due to the stain having minimal pigmentation, it does not protect the wood against UV rays. As such, you will notice that the wood will patina over time (the wood greys out from the UV).
Semi-transparent stains are similar to natural stains except they can be tinted to achieve different colours while also showing the natural wood grain. The additional benefit of the added colour is that the pigment protects the wood from the sun's UV rays.
Q: Do you recommend water-based or oil-based stains?
A: When possible, we always recommend using oil-based stains for exterior deck staining. They last longer, look more natural, don't peel and can usually be easily recoated (this depends on the product). Oil stains penetrate the wood and as such they fade instead of peel as they age.
Water-based products usually form a film overtop the wood and as such, peel when they age. Recoating is difficult because the film prevents other stains from penetrating. In addition, the stain does not adhere well it itself which makes it difficult to recoat even using the same product.
Q: Do existing coatings need to be removed prior to staining?
A: In general, existing coatings need to be removed prior to applying a natural or semi-transparent stain. That is because natural & semitransparent stains work by penetrating the wood and existing coatings could prevent the penetration. However, some products such as Cutek Extreme Wood Oil could be reapplied without stripping if the wood was previously coated with Cutek.
Solid-stains can usually be applied overtop previous stains without having to remove the prior coating. That is because the new solid-stain products are "hybrid" and partially behave like a paint. That means they penetrate but can also adhere to a surface without penetrating.
Q: How long do stains last?
A: Stains on vertical surfaces should last 5+ years depending on the conditions they are exposed to. Horizontal surfaces (especially walking surfaces) should be regularly maintained and have a maintenance coat applied every 2 years. Toronto & the GTA experience has a harsh climate for decks (sunny summers & wet winters). which makes frequent maintenance unavoidable. The name of the game is to reduce the overall lifecycle cost and there is no product which will last forever.
Q: Is there a warranty?
A: We offer a 2 year warranty on exterior painting jobs. However, this does NOT include horizontal surfaces such as decks and hand rails. These areas take a beating and it is unpredictable how they weather.
Q: Why is my deck turning grey?
A: When unprotected wood is exposed to UV, it begins to develop a patina (the fibers turn grey). Some people like the natural patina whereas others find it unsightly. The patina can be sanded off or restored using a deck revive solution. Natural stains do not prevent the patina from developing because there is no pigment in the stain. Semi-transparent stains and solid-stains can protect the wood from UV and prevent greying.
Q: When should I use a solid-stain?
A: Solid stains are best suited for when you want a specific colour (they can be tinted in many colours just like paint), when the wood is ugly, old or has previous coatings. Solid stains can go over top most other stains without looking stupid and do not require excessive prep-work. They can also be applied to bare wood surfaces without needing to be primed (unlike paint). Another reason that homeowners choose solid stains is because they do not peel as they weather; instead they fade or lightly flake like other stains. Solid stains are very easy to maintain. They do not peel like paint and do not require intensive prep to recoat. When the product begins to weather, all you need to do is clean the surface, lightly sand it and then apply the solid stain.
Q: When should I use a natural-stain?
A: Transparent stains are best used when you have nice wood and would like to highlight natural look of the wood grain while providing water protection. Some instances where transparent stains are used are on cedar decks or exotic decks or on front doors with high grade wood. Using a transparent stain is a pricey way of protecting your deck/fence/door. Due to the wood grains being visible, a larger amount of prep-work is required to make the finish product look beautiful. This is especially true if there is an old coating which needs to be stripped. However, new surfaces that are bare and clean do not require a ton of prep. Transparent stains need to be frequently recoated due to the lack of UV protection (lack of pigmentation). As such, they patina (grey) quickly and need to be recoated to restore their natural look. The only product we recommend for transparent stains is Cutek Extreme be cause it can simply be washed with a cleaner and then directly recoated. If you use a different product, you may have to do more intensive prep just to maintain the surfaces. With that being said, the process for applying natural stains is the same as that for semi-transparent stains. The only difference is that you have to be even more thorough.
Q: When should I use a semi-transparent-stain?
A: Semi-transparent stains are used in similar situations to natural stains. They are perfect when you have nice wood, want to highlight the grains AND want to add a colour to the wood. The pigment in semi-transparent stains help them provide additional UV protection when compared to natural stains.

